Tevo Tarantula Assembly Basics
The Tevo Tarantula is a popular and affordable 3D printer, making it a great choice for beginners. This comprehensive guide will walk you through the entire setup process, from unboxing to your first successful print. While the Tarantula offers impressive features for its price, proper setup is crucial. This guide simplifies the setup to ensure a smooth and enjoyable 3D printing experience. We’ll cover everything from assembling the frame to troubleshooting common issues like SD card problems, so you can start printing quickly and efficiently. Follow these steps, and you’ll be well on your way to creating amazing 3D models.
Unboxing and Component Check
Upon receiving your Tevo Tarantula, the first step is unboxing and verifying all the components. Carefully remove everything from the packaging and lay it out. A complete component check is crucial. This ensures all parts are present and undamaged. You should have the printer frame components, all the electronic parts (motherboard, power supply, motors, etc.), the heated bed, the hot end assembly, and various screws, nuts, and bolts. Also, check for the included tools like Allen keys and a screwdriver. It’s also a good idea to compare the contents with the parts list in the user manual. If anything is missing or damaged, contact the seller immediately. This early check prevents frustrations down the road.
Frame and Hardware Assembly

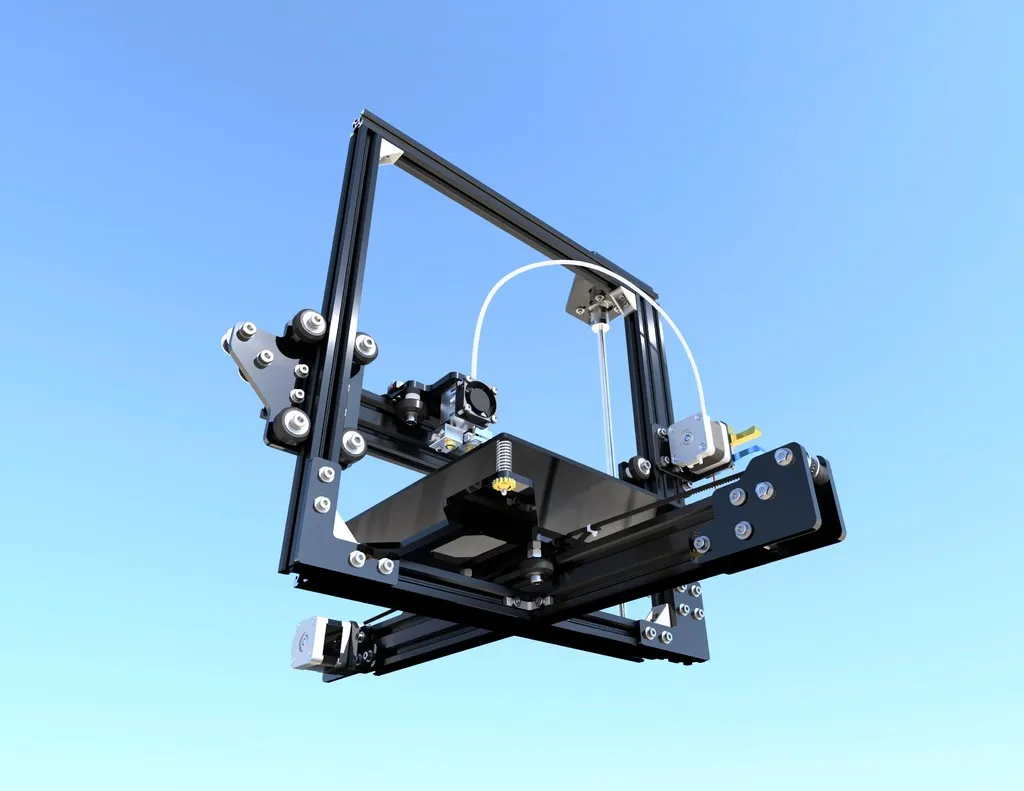
The frame assembly is the foundation of your Tevo Tarantula. Start by assembling the frame using the provided screws and connectors. The frame usually consists of vertical and horizontal aluminum extrusions that form the printer’s structure. Ensure the frame is square and stable. Tighten all screws securely, but avoid over-tightening. Excessive force can strip the threads. Next, attach the moving parts: the X-axis carriage (holds the hot end), the Y-axis bed, and the Z-axis components (vertical supports). These parts move along the frame, allowing the printer to create three-dimensional objects. Refer to the manual for detailed instructions on how to correctly position and secure each component.
Electronics Setup
The electronics setup involves connecting the various electrical components of your Tevo Tarantula. This includes connecting the power supply, the motors (X, Y, Z, and extruder), the endstops, and the heated bed. First, make sure the printer is unplugged before handling any electrical connections. It’s always better to be safe. Carefully connect the power supply to the motherboard, ensuring correct voltage settings (usually 110V or 220V, depending on your region). Then, connect the stepper motors to the corresponding motor drivers on the motherboard. Each motor controls a specific axis (X, Y, or Z), allowing for precise movement. Double-check that all connections are secure and that the polarity is correct. Incorrect connections can damage the electronics or prevent the printer from functioning.
Connecting the Power Supply
Connecting the power supply correctly is critical for safe operation. Identify the input voltage switch on the power supply (usually 110V/220V). Select the appropriate voltage for your region. Connect the power supply to the motherboard using the provided wires. Usually, there are terminals for the positive and negative DC voltage. Ensure these connections are secure to prevent any shorts or disconnections. After all connections are made, double-check that everything is properly wired before plugging the power supply into a wall outlet. It’s always wise to visually inspect the connections again before applying power to the printer for the first time. If you are not familiar with electrical wiring, seek assistance from someone who is.
Wiring the Motors and Endstops

The motors and endstops provide precise movement. Connect the stepper motors to the motor driver slots on the motherboard. These motors control the movement of the print head (X, Y, Z) and the extruder (E). Make sure the motor cables are connected correctly and securely. Then, wire the endstops. Endstops are small switches that tell the printer when it has reached the end of an axis’s travel. They are usually connected to the motherboard via small cables. Each endstop corresponds to an axis (X, Y, or Z). Correctly wiring the endstops is essential to prevent the print head from crashing into the frame. Refer to the Tevo Tarantula’s manual to identify the correct terminals for each motor and endstop, as incorrect wiring can damage components or lead to printing errors.
SD Card Basics for Tevo Tarantula
The SD card is a crucial element for 3D printing with the Tevo Tarantula. It stores the G-code files that tell the printer what to print. Before you begin printing, you must prepare and format the SD card correctly. A correctly prepared SD card is critical for the printer to recognize and read your print files. Many problems can arise if the SD card is not properly formatted or the files are not correctly placed on the card. Ensure you understand the proper formatting and file transfer procedures to eliminate any SD card-related issues. This section covers formatting, file transfer, and other fundamental aspects of using an SD card with your Tevo Tarantula.
SD Card Formatting and Preparation
Before using an SD card with your Tevo Tarantula, you need to format it. Formatting prepares the card for use and ensures compatibility with the printer. It’s recommended to format the SD card using the FAT32 file system. The Tevo Tarantula’s motherboard typically uses FAT32, ensuring compatibility with the printer’s firmware. To format the card, insert it into your computer and use the operating system’s formatting tool. In Windows, right-click on the SD card drive, select “Format,” choose FAT32 as the file system, and start the process. Be sure to back up any data on the SD card before formatting, as this will erase all existing information. Proper formatting ensures the SD card works seamlessly with your printer.
File Transfer to SD Card

After formatting the SD card, you must transfer your 3D model files (G-code) to the card. G-code is the language that your 3D printer understands. You generate G-code using slicing software (like Cura or Simplify3D). Slice your 3D model, choosing the appropriate settings for your filament and desired print quality. Once the slicing is complete, save the G-code file to your computer. Then, connect the formatted SD card to your computer and copy the G-code file onto the card. Organize the files in a clear and understandable structure. This organization helps you quickly locate your files on the printer’s control panel. Ensure the file names are relatively short and do not contain any special characters, as this can sometimes cause issues with the printer’s firmware. Safely eject the SD card from your computer after the transfer is complete.
Preparing Your First Print
Before starting your first print, it’s essential to perform a few preliminary steps. This preparation will significantly increase your chances of a successful print and help prevent common problems. This preparation includes loading the filament, leveling the bed, and other important considerations. Proper preparation prevents a wide range of issues like poor adhesion, uneven layers, and nozzle clogs. Taking the time to prepare ensures a smoother printing experience. These preparatory steps are crucial for achieving good print quality.
Loading Filament and Leveling the Bed
Load your chosen filament into the extruder. Many Tevo Tarantula printers use 1.75mm filament. Heat the hot end to the appropriate temperature for your filament type (e.g., PLA, ABS, PETG). Use the printer’s control panel to heat the hot end. Once the hot end is hot, insert the filament into the extruder and push it through until it starts to extrude from the nozzle. Leveling the bed is crucial for proper first-layer adhesion. Use the printer’s control panel to move the print head to each corner of the bed. Use a piece of paper between the nozzle and the bed to adjust the bed’s height using the leveling screws until you feel slight friction when moving the paper. Repeat this process for each corner, ensuring the bed is level across the entire surface. A properly leveled bed ensures the first layer adheres correctly.
First Print Calibration and Testing

Select a test print file (usually a small calibration cube) from the SD card using the printer’s control panel. Start the print and observe the first layer. The first layer is crucial for good adhesion and overall print quality. The nozzle should be close enough to the bed that the filament sticks properly, but not so close that it gets squished. Monitor the print and make any necessary adjustments to the bed leveling or other settings (like the first-layer height) during the print. Once the first layer is complete, watch the remainder of the print to make sure it is progressing well. If you experience any issues, such as poor adhesion or layer shifting, you may need to adjust your print settings. Calibration prints allow you to fine-tune the printer settings for optimal results. Make small adjustments for the best prints.
Troubleshooting SD Card and Printing Issues
SD card and printing issues can often be resolved with careful troubleshooting. The Tevo Tarantula printer, like other 3D printers, is not immune to these issues. It’s important to identify the problem and address it to get your printer functioning. This section covers some of the most common issues. Troubleshooting saves you time and material, helping you print with less frustration. Being able to diagnose and fix SD card and printing issues helps you get your printer working efficiently.
SD Card Not Detected
If your Tevo Tarantula does not recognize the SD card, first ensure the card is correctly inserted. Double-check the orientation and make sure it is fully inserted into the SD card slot. Try another SD card to rule out a faulty card. If another card works, the initial card may have compatibility issues or be damaged. Reformat the SD card using the FAT32 file system. Also, make sure the SD card isn’t write-protected. Check the physical switch on the SD card itself. If the card is properly inserted, formatted, and not write-protected, then examine the SD card reader on the printer’s motherboard. It’s possible that the reader is damaged. This is often the cause if it is not detecting any card.
Printing from SD Card Fails

If the printer recognizes the SD card, but the print fails to start or fails mid-print, it can be a variety of causes. Ensure the G-code file is valid and properly sliced for your printer. Try re-slicing the model or downloading a known working G-code file. Check the SD card for corruption. Try copying the G-code file to the card again. Reduce the printing speed. Some printers may have difficulty processing complex or fast print speeds from the SD card. If the print fails at a specific point, it may indicate a problem with the model or the G-code. Examine the G-code for errors. If these steps do not fix the issue, you might need to update the firmware on your printer. The latest firmware often resolves any known issues.
Common Problems and Solutions
Besides SD card issues, other common problems can affect your 3D printing experience. Poor bed adhesion often results from an improperly leveled bed. Level the bed again, and use a bed adhesive (like glue stick or hairspray). Nozzle clogs are another frequent issue. Heat the hot end and try using a cleaning needle to clear the clog. If the nozzle continues to clog, consider replacing the nozzle. Layer shifting can occur due to loose belts or incorrect motor current settings. Tighten the belts and adjust the motor current via the printer’s firmware. Filament tangling is also a common problem. Regularly check the filament spool and ensure it can unwind smoothly. By understanding these common problems and their solutions, you can significantly improve your printing success rate. Regular maintenance and troubleshooting are essential to ensure that your Tevo Tarantula runs efficiently.