Why Upgrade to Linear Rail for Tevo Tarantula?
The Tevo Tarantula, a popular entry-level 3D printer, offers a great platform for 3D printing enthusiasts. However, like any machine, there’s room for improvement. One of the most impactful upgrades you can make is to replace the stock V-slot wheels with linear rails. This transformation drastically improves the printer’s performance, leading to higher print quality and overall reliability. This article explores the benefits of upgrading your Tevo Tarantula to linear rails, guides you through the selection process, and provides a step-by-step installation guide, helping you unlock the full potential of your 3D printer. This upgrade is not just for experienced users; even beginners can see significant improvements with this modification.
Improved Print Quality and Precision
One of the most noticeable improvements when switching to linear rails is the enhanced print quality. The stock wheels on the Tevo Tarantula can introduce play and wobble, leading to imperfections in the printed parts. Linear rails provide a much more stable and precise platform for the print head to move along. This translates to sharper details, smoother surfaces, and more accurate dimensions in your prints. Fine details that might have been lost or blurred with the stock setup will now be clearly defined. The elimination of play also leads to better layer adhesion, resulting in stronger and more durable prints. This improvement in precision makes it easier to print complex designs and achieve professional-looking results.
Reduced Wobble and Vibrations

Vibrations are a common enemy of 3D printing, often causing ringing, ghosting, and other artifacts in your prints. Linear rails significantly reduce these vibrations. The rigid structure of linear rails, coupled with their smooth and precise movement, minimizes the oscillations that can be caused by the printer’s movement. This reduction in wobble and vibration allows for faster print speeds without sacrificing quality. You can confidently push your printer to its limits without the fear of print failures due to vibration-induced imperfections. The stability offered by linear rails is a game-changer, particularly for printing tall and slender objects that are more susceptible to movement.
Enhanced Overall Print Performance
Beyond print quality and reduced vibrations, linear rails contribute to enhanced overall print performance. The smoother motion of the print head leads to more consistent extrusion and better layer adhesion. The overall result is a printer that’s more reliable and easier to work with. You’ll find that your prints require less post-processing, saving you time and effort. Furthermore, with the increased stability, your printer is less likely to experience print failures, reducing wasted materials and frustration. This enhanced performance makes the entire 3D printing process more enjoyable and efficient, whether you’re a hobbyist or a professional.
What Are Linear Rails?
Linear rails, also known as linear guides, are precision components that provide a smooth and accurate linear motion for moving parts. They consist of a rail and a carriage (or block) that moves along the rail. The carriage contains ball bearings or rollers that circulate within the rail, allowing for frictionless or low-friction movement. Linear rails are designed to handle heavy loads, provide high stiffness, and offer excellent positional accuracy, making them ideal for applications where precise and reliable movement is crucial. Their robust design and ability to minimize play make them a superior alternative to traditional wheel-based systems commonly found on many 3D printers.
Understanding Linear Motion Systems

Linear motion systems are fundamental to many machines, including 3D printers. They enable precise and controlled movement along a straight line. Understanding these systems helps in appreciating the benefits of upgrading to linear rails. The key components of a linear motion system include the moving part (e.g., the print head), the guiding mechanism (linear rail), and the drive system (typically a stepper motor and belt or leadscrew). The linear rail acts as the guiding mechanism, ensuring that the moving part travels along a defined path with minimal deviation. This precision is critical for achieving accurate and high-quality prints in 3D printing applications. The smoothness and accuracy of the linear motion directly affect the final print’s quality.
Types of Linear Rails Available
Several types of linear rails are available, each with its own advantages and disadvantages. The most common types for 3D printer upgrades are the miniature linear guide rails. They come in various sizes and load capacities, making them suitable for different printer models and applications. There are also ball-bearing and roller-based systems. Ball-bearing rails are often preferred for their low friction and smooth operation. Roller-based systems can handle higher loads but may have slightly more friction. The selection of the appropriate type of linear rail depends on factors such as the size of your printer, the weight of the moving parts, and the desired level of precision. Consider MGN series (MGN7, MGN9, MGN12) rails or similar miniature rails for your Tevo Tarantula upgrade.
Top 5 Linear Rails for Tevo Tarantula
When choosing linear rails for your Tevo Tarantula, the MGN series is a popular choice. Here’s a look at some of the best options and their key features. These rails provide excellent performance and are relatively easy to install. Consider factors like load capacity, precision, and cost when making your decision. The goal is to find a balance between performance and budget to get the most out of your upgrade. The following list provides several popular and well-regarded options, helping you make an informed decision.
MGN12H Rail and Carriage

The MGN12H is a widely used linear rail known for its versatility and smooth operation. It is often selected as a good balance between performance and affordability. The ‘H’ in MGN12H denotes the carriage’s height, which is important to ensure compatibility with your printer’s frame. The MGN12H provides good load-bearing capacity and is suitable for most Tevo Tarantula upgrades. These rails are known for their smooth and quiet operation, contributing to improved print quality. Their widespread availability makes them an accessible option for both beginners and experienced users.
Pros and Cons of MGN12H
Pros of using MGN12H rails include improved print quality, reduced vibration, and easy installation. The MGN12H rails provide high stability, contributing to a more precise printing process. This model is durable and long-lasting, making it a worthwhile investment. Cons include the potential need for modifications to the printer’s frame during installation and a slightly higher cost compared to other alternatives. Ensure proper alignment during installation to maximize the benefits of this upgrade. Careful consideration of these factors will help you determine if the MGN12H is the right choice for your needs.
MGN9H Rail and Carriage
The MGN9H is another excellent choice, particularly if you’re looking for a slightly more compact option. This rail is often used on the X and Y axes, offering improved precision. The MGN9H offers good load capacity, sufficient for most Tevo Tarantula setups. While slightly less robust than the MGN12H, the MGN9H offers a great balance of performance and cost, making it a popular upgrade. Its compact size can also be beneficial in certain setups. This is a suitable choice for those seeking improved performance without a significant investment.
Pros and Cons of MGN9H

Pros include excellent precision, compatibility with various printer setups, and a more affordable price point compared to larger models. The MGN9H also contributes to smoother movements and better overall print quality. Cons include a slightly lower load capacity than the MGN12H. Ensure proper installation and alignment to get the most out of the MGN9H rails. For most Tevo Tarantula applications, the MGN9H provides an excellent balance between performance and cost, making it a compelling choice for upgrading your 3D printer.
Hiwin Linear Rails
Hiwin is a well-respected brand known for its high-quality linear rails. Although Hiwin rails are generally more expensive, they offer exceptional precision and durability. Hiwin linear rails are designed for high-performance applications, providing superior smoothness and accuracy. While the initial investment is higher, the increased lifespan and exceptional performance can make them a worthwhile choice for serious 3D printing enthusiasts looking for the best possible results.
Pros and Cons of Hiwin Rails
Pros include unmatched precision, exceptional durability, and extremely smooth operation. Hiwin rails are designed for the most demanding applications, ensuring top-notch print quality. Cons include a higher cost and potential for more complex installation due to the precision requirements. While more expensive, Hiwin rails can provide exceptional performance for serious 3D printing enthusiasts and professionals. These rails are an investment in your printer’s performance, offering long-term benefits that can significantly enhance print quality and consistency.
Installation Guide for Linear Rail

Installing linear rails on your Tevo Tarantula is a rewarding project that significantly improves your printer’s performance. While the process may seem daunting initially, following these steps will help you achieve a successful upgrade. Taking your time and ensuring proper alignment are key to getting the best results. Before you start, carefully review the instructions and have all the necessary tools and materials ready. Patience and precision will pay off, resulting in a printer that delivers exceptional print quality.
Tools and Materials Required
Before beginning the installation, gather the necessary tools and materials. You’ll need the linear rails, carriages, and mounting hardware (screws, nuts). You’ll also need a set of Allen wrenches or hex keys, a screwdriver, a level, and a ruler or calipers for precise measurements. Consider having a set of calipers to measure the printer’s frame. Make sure you have safety glasses to protect your eyes. You might also need a drill and appropriate drill bits depending on the specific mounting method. Having all the necessary tools and materials at hand will simplify the installation process and ensure a smooth workflow.
Step-by-Step Installation Process
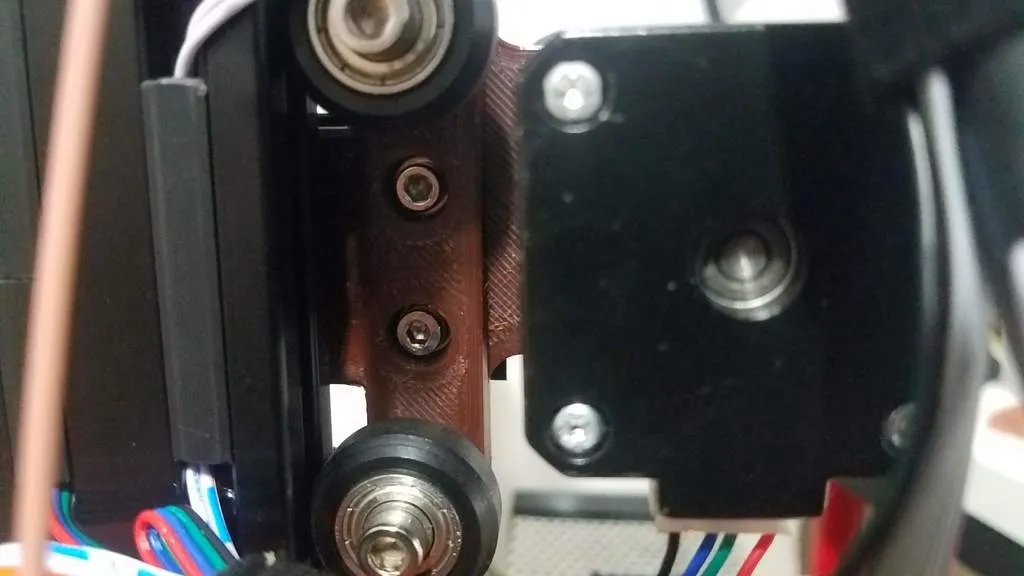
The installation process involves removing the old V-slot wheels, mounting the linear rails to the printer’s frame, and attaching the carriages to the moving parts. Begin by disassembling the printer’s X-axis, Y-axis, and Z-axis. Remove the existing wheels and their mounting hardware. Next, attach the linear rails to the frame using the appropriate screws and brackets. Precise alignment is crucial at this stage. Then, mount the carriages to the print head and bed. Finally, reassemble all the components, ensuring that the moving parts move smoothly along the rails. Refer to the specific instructions provided with your linear rail kit, as the exact steps may vary depending on the design.
Calibration and Tuning After Installation

Once the linear rails are installed, calibration and tuning are essential to ensure optimal performance. Start by leveling the print bed. Carefully adjust the bed level to achieve the correct first-layer adhesion. Then, check the belts for proper tension. Proper belt tension is crucial for precise movements. Fine-tune the stepper motor drivers to ensure they are correctly configured for the new linear rails. Run a few test prints, and adjust the printer’s settings as needed to achieve the best possible print quality. This may involve tweaking the acceleration, jerk settings, and other parameters in your slicer software. Fine-tuning your printer after installing linear rails ensures optimal print results.
Troubleshooting Common Issues
Even with a careful installation, you might encounter a few issues. These are some common problems and solutions. Addressing these issues will ensure the successful operation of your 3D printer. Most problems can be solved with patience and attention to detail. Troubleshooting is a part of the DIY process.
Print Bed Leveling Problems
After installing linear rails, you might find that print bed leveling becomes more challenging. This can be due to slight misalignments or variations in the bed’s surface. To address this, carefully level the bed using the bed leveling screws. If the issue persists, consider using a bed leveling sensor or adjusting the Z-offset in your printer’s firmware. Make sure the bed is stable and doesn’t wobble. If your bed leveling issues persist, ensure the frame is square and that the linear rails are properly aligned. Fine-tuning the bed leveling process is important to ensure that the initial layer adheres correctly to the build plate.
Noisy Rail Operation

If your linear rails are making noise, this might indicate a problem with lubrication or alignment. Ensure that the rails are properly lubricated according to the manufacturer’s instructions. Use a high-quality lubricant designed for linear rails. If the noise persists, check the alignment of the rails. Misalignment can cause friction and noise. Ensure that the rails are parallel and that the carriages move smoothly along them. Tighten all screws to eliminate any play. Proper lubrication and alignment are key to a quiet and smooth operation of the linear rails.
Benefits of Linear Rail
Upgrading to linear rails on your Tevo Tarantula offers several key benefits. The improvement in print quality is significant, with sharper details and smoother surfaces. Reduced vibrations and wobble enhance the accuracy and consistency of your prints. The increase in overall print performance translates to faster print speeds, making your 3D printing projects more efficient. Additionally, the long-term reliability and durability of linear rails will lead to a more reliable and long-lasting 3D printer.
Increased Print Speed and Accuracy
The increased precision offered by linear rails allows for faster print speeds without sacrificing print quality. The elimination of play and wobble means the printer can move more rapidly and accurately. This translates to quicker print times and increased productivity. The stability of linear rails also reduces the likelihood of print failures, further improving efficiency. This enhancement in print speed and accuracy makes the upgrade a worthwhile investment, especially for users who print large quantities of parts or need high-precision prints.
Long-Term Reliability and Durability
Linear rails are known for their long-term reliability and durability. Unlike the V-slot wheels, which can wear out over time, linear rails offer a more robust and durable solution. The smooth and precise movement provided by the rails results in less stress on the printer’s components, extending their lifespan. This upgrade is a long-term investment in the printer’s overall reliability, ensuring it continues to deliver consistent and high-quality prints for years to come. By choosing the right linear rails and following the installation steps, you can significantly extend the life of your 3D printer.
Final Thoughts on Linear Rail for Tevo Tarantula
Upgrading your Tevo Tarantula with linear rails is a highly recommended modification for anyone looking to improve print quality, reduce vibrations, and enhance overall performance. While the initial investment and installation effort may seem significant, the benefits far outweigh the drawbacks. The increased precision, reliability, and speed will transform your 3D printing experience. By carefully selecting the right linear rails, following the installation guide, and troubleshooting any issues that may arise, you can unlock the full potential of your Tevo Tarantula and enjoy a superior 3D printing experience. This upgrade will allow you to create more detailed, accurate, and reliable prints.